 Save
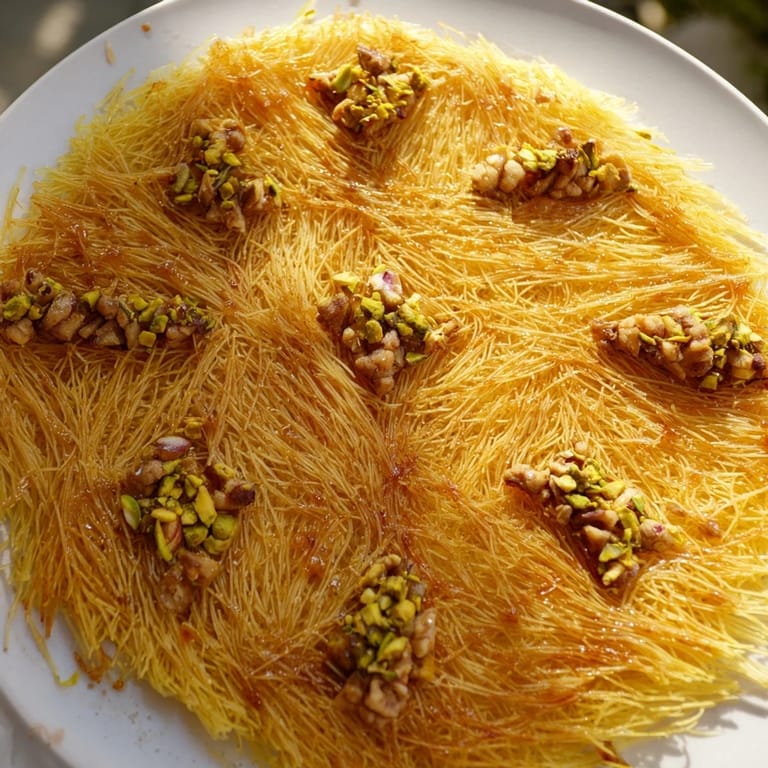
Save My aunt's kitchen in Cairo smelled like honey and cardamom the first time she taught me to make konafa, her hands moving through the shredded phyllo with such ease that it looked effortless, though I'd soon discover it wasn't. She'd wait for that exact golden moment when the pastry shifted from pale to amber, then pour the warm syrup over it without hesitation, and somehow it all came together into something crispy and tender at once. That dessert became the thing I made to feel close to her even when we were continents apart.
I brought this to a potluck once, and someone asked if I'd bought it from a bakery because they couldn't believe how restaurant-quality it looked, which is funny because I'd made it in a slightly too-small pan with borrowed butter. The compliment stuck with me more than any fancy dessert I've spent hours perfecting, probably because konafa feels like sharing something genuine rather than showing off.
Ingredients
- Kataifi (500 g): This shredded phyllo is the soul of the dessert, and you want it thawed but cold before you work with it, otherwise it becomes sticky and impossible to separate.
- Unsalted butter (200 g): Melt it fully so it soaks into every strand and creates that golden, crisp texture.
- Walnuts (150 g): Chop them finely so they nestle into the layers without making the filling dense or heavy.
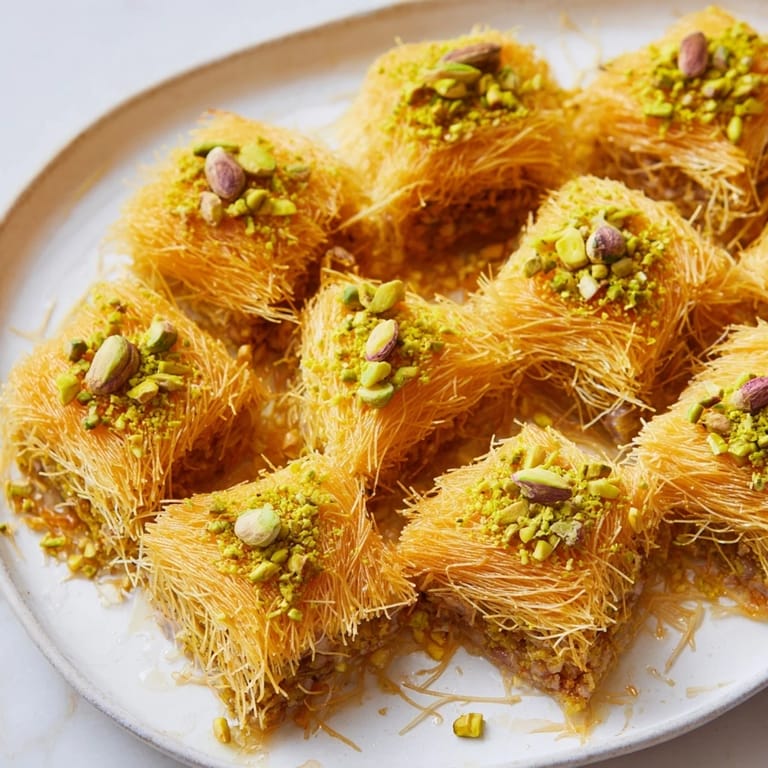
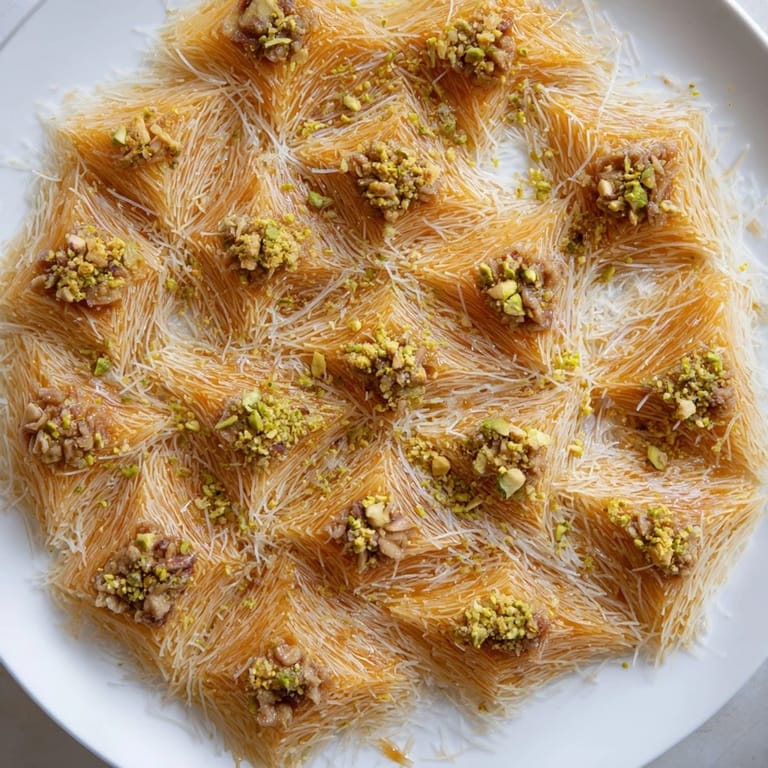
- Pistachios (100 g): These add a slight earthiness and beautiful color that peeks through when you slice it.
- Almonds (50 g): Use these to round out the flavor profile, they're not the star but they matter.
- Cinnamon and cardamom: Go easy on these spices; you want warmth, not a spice-forward punch that overwhelms the delicate pastry.
- Honey syrup ingredients: The sugar and water base should simmer just long enough to reach a light syrup consistency, then you add honey and lemon juice for brightness.
Tired of Takeout? 🥡
Get 10 meals you can make faster than delivery arrives. Seriously.
One email. No spam. Unsubscribe anytime.
Instructions
- Prepare your station:
- Preheat the oven to 180°C and grease a 23 cm round pan with melted butter so the bottom doesn't stick. Have everything measured and ready because once you start working with the kataifi, you'll want to move without rushing.
- Loosen the pastry:
- Take the thawed kataifi and gently separate the strands with your fingers, working it into a cloud-like texture rather than tight clumps. This matters more than you'd think; even separation means even browning.
- Layer the base:
- Press half the loosened kataifi into the pan to form a flat, compact base, then brush it generously with half the melted butter until every visible strand glistens. The butter is what creates the crispness, so don't be shy.
- Add the filling:
- Mix your chopped nuts with sugar, cinnamon, and cardamom in a bowl, then spread this mixture evenly over the butter-brushed base. The nuts should form a single, even layer so when you slice the finished konafa, each piece has the same balance.
- Top and seal:
- Layer the remaining kataifi over the filling, pressing gently so it settles but doesn't compress, then brush the entire top with the rest of your melted butter. This top layer will be what turns golden and gives you that contrast with the filling underneath.
- Bake until golden:
- Slide it into the oven for 30 to 35 minutes until the top is deep amber and crisp when you press it lightly with a fork. If it's browning too fast, lower the oven temperature slightly.
- Make the syrup while it bakes:
- In a small saucepan, combine sugar and water, bring to a boil, then let it simmer for 7 to 8 minutes until it thickens slightly. Stir in honey, lemon juice, and rose water if you're using it, then set aside to cool a little.
- Drizzle immediately:
- The moment the konafa comes out of the oven, pour the warm syrup evenly over the hot pastry, watching as it soaks into the layers. This is the magic moment where everything comes together.
- Cool and cut:
- Let it rest for 30 minutes so it sets properly, then slice into diamond or square shapes with a sharp knife using gentle sawing motions. Serve at room temperature when it's crisp again.
 Save
Save There's a moment when you pull konafa out of the oven and the kitchen fills with this toasted, honey-sweetened warmth that makes you understand why people gather around desserts. That smell is worth everything, the careful layering and the waiting and the bit of sticky butter under your fingernails.
Choosing Your Nuts
You can absolutely swap out the nuts depending on what you love or what you have; hazelnuts bring a roasted depth, cashews add creaminess, and pecans give an almost buttery warmth. The rule is to keep them finely chopped so they integrate into the layers rather than create thick pockets that make slicing harder. I've made versions with half walnuts and half pistachios when I was short on ingredients, and honestly it was better than the traditional ratio.
The Syrup: Why It's Not Optional
Some people make konafa without syrup, and I understand the logic, but you'd be missing the whole point of this dessert. The syrup is what takes it from a crispy nut pastry to something with real complexity and moisture, and that cooling period where it gets reabsorbed is when the magic happens. If you're nervous about it being too sweet, use less honey or add more lemon juice to cut through it.
Serving and Storage
Konafa is best eaten the day you make it while the pastry is at its crispiest, but it keeps beautifully for two or three days in an airtight container and honestly tastes richer as the flavors meld. You can serve it plain, with whipped cream, with fresh berries scattered on top, or with strong coffee on the side. If you want to add ricotta or clotted cream, layer it between the kataifi before baking and adjust your syrup amount slightly so it doesn't get overwhelmed.
- Store in an airtight container at room temperature; refrigeration can make the pastry soften.
- You can assemble konafa a few hours ahead and bake it when guests arrive for warm, just-made flavor.
- A sharp serrated knife makes clean cuts without crushing the delicate layers.
 Save
Save Make this when you want to feel connected to something older than yourself, or when someone in your life needs to know they're worth the effort. Konafa is simple enough to repeat but thoughtful enough to matter.
Recipe FAQ
- → What type of pastry is used in Konafa?
Kataifi, a shredded phyllo dough, is used to create the crisp layers in Konafa, offering a delicate, flaky texture.
- → Which nuts are traditionally included in the nut filling?
Walnuts, pistachios, and almonds are finely chopped and spiced to form the rich nut filling complementing the pastry layers.
- → How is the honey syrup prepared?
The syrup is made by boiling sugar and water, then simmering and mixing with honey, lemon juice, and optionally rose or orange blossom water for fragrance.
- → Can the nut mixture be varied?
Yes, nuts like hazelnuts, cashews, or pecans can substitute or be added to customize the flavor and texture.
- → What baking equipment is essential for this dish?
A 23 cm round baking pan, a small saucepan for syrup, mixing bowls, a pastry brush, and a sharp knife are recommended tools.
- → How long should the dessert cool before serving?
Allow it to cool for about 30 minutes after syrup application to let flavors meld and ensure proper slicing.