 Save
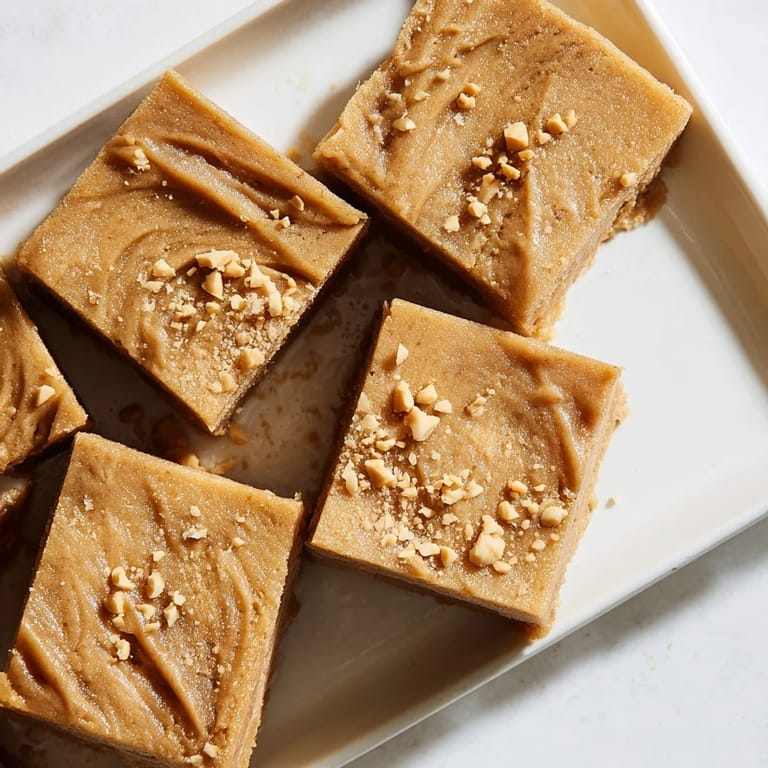
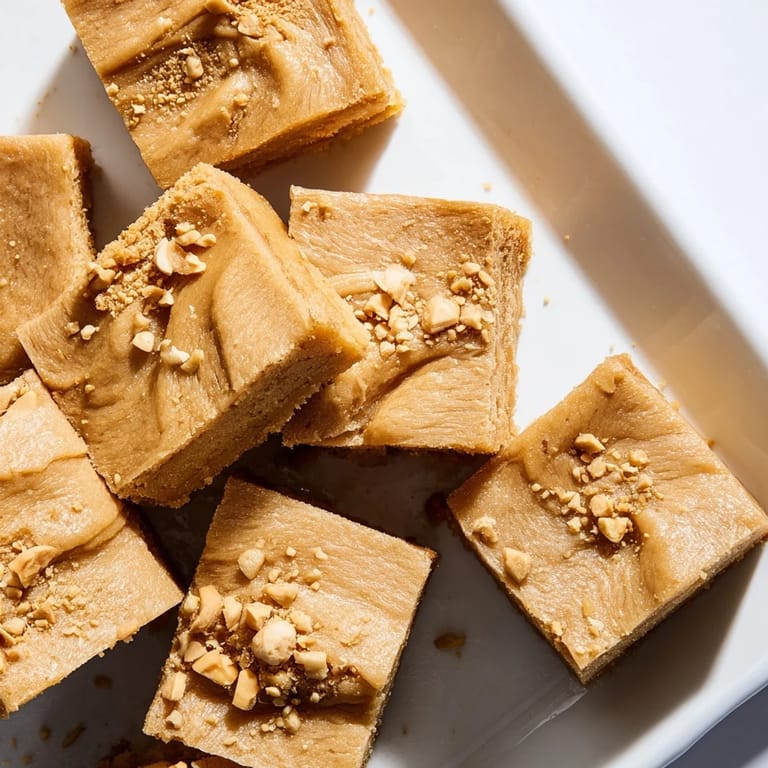
Save I was craving something sweet one rainy afternoon when I spotted a jar of peanut butter in the pantry and remembered a bag of mochiko flour I'd bought months ago. I had no idea they'd work together, but the idea stuck. An hour later, I pulled a golden, glossy pan from the oven that smelled like a dream. That first bite—chewy, nutty, not too sweet—made me wonder why I hadn't tried this sooner.
I made this for a potluck once, unsure if anyone would even try it. By the end of the night, the pan was scraped clean and three people asked for the recipe. One friend said it reminded her of the mochi cakes her grandmother used to make, but with a twist she'd never imagined. That's when I realized this little experiment had become something worth sharing.
Ingredients
- Sweet rice flour (mochiko): This is what gives the cake its signature chew, make sure it says glutinous or sweet rice flour because regular rice flour won't work.
- Granulated sugar: Just enough sweetness to balance the peanut butter without making it cloying.
- Baking powder: A little lift keeps the texture tender instead of dense.
- Salt: Brings out the nutty flavor and keeps everything in balance.
- Whole milk: Adds richness and helps create that creamy batter.
- Coconut milk (full fat): This is key for moisture and a subtle tropical note that plays beautifully with peanut butter.
- Eggs: They bind everything together and give the cake structure.
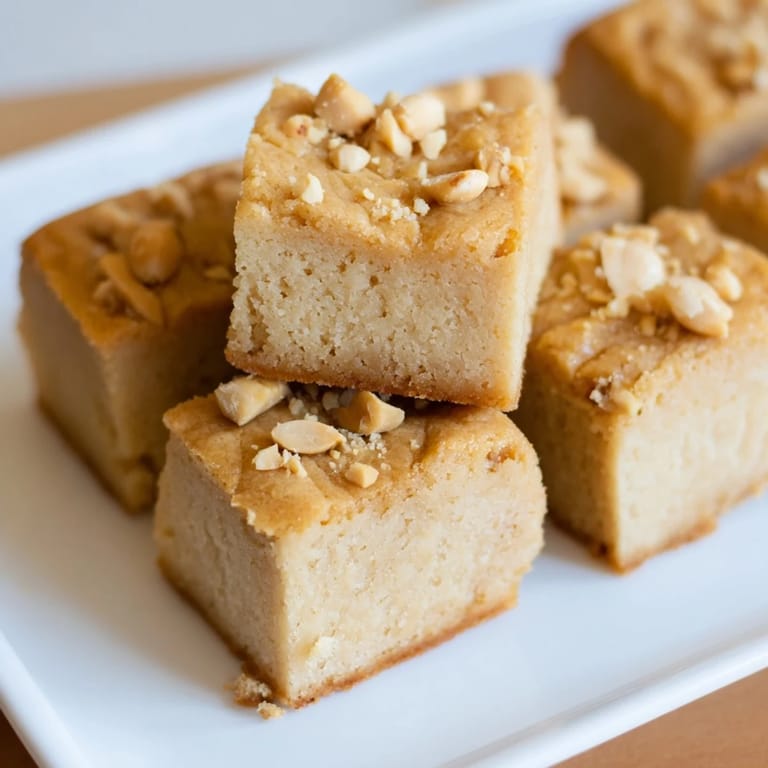
- Creamy peanut butter: Use the regular kind, not natural, it blends smoother and tastes more nostalgic.
- Unsalted butter (melted): Adds richness and helps the top turn golden and glossy.
- Vanilla extract: A hint of warmth that rounds out all the other flavors.
Tired of Takeout? 🥡
Get 10 meals you can make faster than delivery arrives. Seriously.
One email. No spam. Unsubscribe anytime.
Instructions
- Preheat and Prep:
- Set your oven to 350°F and grease a 9x13-inch pan or line it with parchment. I like parchment because it makes lifting out clean slices so much easier.
- Whisk the Dry Mix:
- Combine the mochiko, sugar, baking powder, and salt in a large bowl. Make sure there are no lumps hiding in the flour.
- Blend the Wet Ingredients:
- In another bowl, whisk together the milk, coconut milk, eggs, peanut butter, melted butter, and vanilla until completely smooth. The peanut butter should disappear into the liquid.
- Combine and Smooth:
- Pour the wet mixture into the dry ingredients and whisk until you have a silky, lump-free batter. It should be pourable and a little glossy.
- Pour and Tap:
- Pour the batter into your prepared pan and tap it gently on the counter a few times to release any trapped air bubbles.
- Bake Until Golden:
- Slide it into the oven for 45 to 50 minutes, until the top is golden brown and a toothpick comes out clean. The edges might puff up a bit, that's normal.
- Cool Completely:
- Let the cake cool fully in the pan before slicing. It will firm up as it cools and the texture will set perfectly.
- Slice and Serve:
- Cut into squares and serve at room temperature or chilled. Both ways are delicious, just depends on your mood.
 Save
Save The best part about this cake is how it brings people together without any fuss. I've served it at birthdays, book clubs, and quiet weekday evenings, and it always feels both familiar and a little surprising. There's something comforting about a dessert that doesn't need frosting or layers to make people smile.
Storage and Make-Ahead Tips
This cake keeps beautifully in an airtight container in the fridge for up to five days. I actually prefer it cold, straight from the fridge, when the texture is extra chewy and the peanut butter flavor deepens. You can also freeze individual squares wrapped in plastic wrap for up to a month, then thaw them at room temperature whenever a craving hits.
Flavor Variations to Try
Once you've made the classic version, try swapping the peanut butter for almond or cashew butter for a different nutty vibe. You can also fold in chocolate chips, swirl in a little jam before baking, or top with a handful of roasted peanuts for crunch. I've even added a tablespoon of matcha powder to the dry ingredients for a green tea twist that looked stunning and tasted incredible.
Serving Suggestions
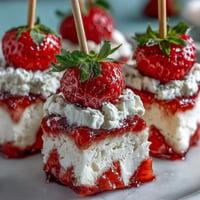
This cake is perfect on its own, but it shines even brighter with a few simple additions. A dollop of whipped cream, a scoop of vanilla ice cream, or fresh sliced strawberries all make it feel a little more special without any extra effort.
- Serve it with a cup of hot tea or coffee for an afternoon treat.
- Pair it with coconut ice cream to echo the tropical notes in the batter.
- Dust the top lightly with powdered sugar for a simple, elegant finish.
 Save
Save This cake taught me that the best recipes don't always come from cookbooks, sometimes they come from curiosity and a willingness to try something a little unusual. I hope it becomes a staple in your kitchen the way it has in mine.
Recipe FAQ
- → What flour is best for this dessert?
Glutinous rice flour, also known as mochiko, ensures the chewy texture essential for this dish.
- → Can I substitute coconut milk?
Yes, evaporated milk can be used for a lighter flavor, but coconut milk adds a richer taste.
- → How do I know when it’s fully baked?
Look for a golden brown top and test with a toothpick; it should come out clean when done.
- → What enhances the texture with added crunch?
Sprinkling roasted peanuts on top before baking adds a pleasant nutty crunch.
- → How should leftovers be stored?
Keep them in an airtight container in the refrigerator to maintain freshness.