Save
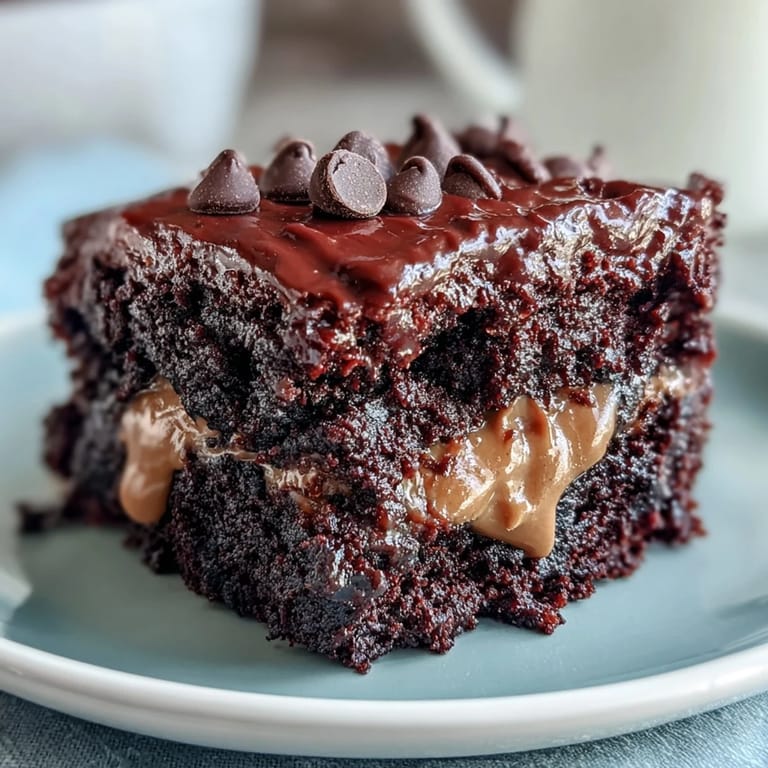
Save The first time I made this for a Tuesday night book club, nobody believed it started with a boxed cake mix. My friend Sarah actually asked for the recipe three times, suspicious I was hiding some elaborate technique. Sometimes the most dangerously delicious desserts are the ones that come together in minutes but taste like you spent all afternoon in the kitchen.
Last winter during a snowed-in weekend, my teenage nephew and I made this together. He was skeptical about dumping everything into one pan, but I told him the magic happens in the oven. When we pulled it out, steam curling off the melting chocolate chips, he immediately asked if we could make another one for his friends coming over later.
Ingredients
- Devils food chocolate cake mix: The rich cocoa base balances the sweet peanut butter perfectly, though any chocolate cake mix works in a pinch
- Creamy peanut butter: Room temperature is crucial here so it spreads easily across the bottom of your pan
- Unsalted butter, melted: Salted butter works too, just skip the pinch of salt if your mix already contains it
- Whole milk: I have used almond milk successfully, though the texture is slightly less rich
- Mini peanut butter cups: Regular sized ones chopped into quarters work beautifully, so use whatever you have on hand
- Semi sweet chocolate chips: Milk chocolate makes it sweeter while dark chocolate cuts through the richness
Tired of Takeout? 🥡
Get 10 meals you can make faster than delivery arrives. Seriously.
One email. No spam. Unsubscribe anytime.
Instructions
- Get your oven ready:
- Preheat to 350°F and grease a 9x13 inch baking dish thoroughly, paying attention to the corners
- Create the peanut butter foundation:
- Spread the room temperature peanut butter in an even layer across the bottom of your prepared pan, using the back of a spoon to smooth it out
- Mix the cake batter:
- Whisk together the cake mix, melted butter, and milk until just combined, remembering that small lumps will disappear during baking
- Layer it up:
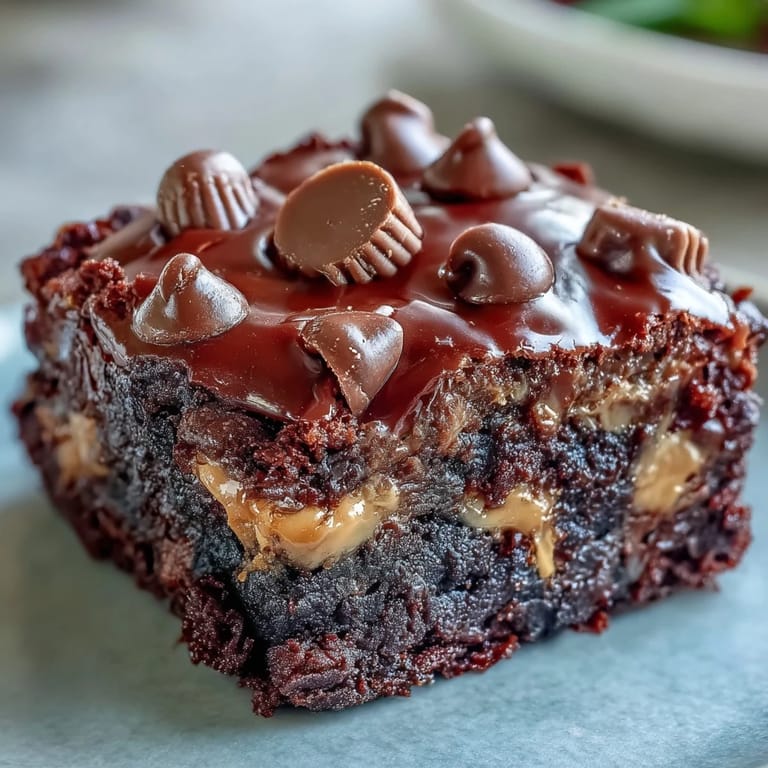
- Pour the batter over the peanut butter layer carefully, then scatter the peanut butter cups and chocolate chips across the top
- Bake until magic happens:
- Bake for 35 to 40 minutes until the cake is set and a toothpick comes out with moist crumbs but not wet batter
- Practice patience:
- Let it cool for at least 15 minutes before serving, though 30 minutes gives you cleaner slices if you are serving guests
 Save
Save My grandmother would have called this company food, the kind of dessert that makes people linger around the table longer than planned. I have learned to always make it when I want a dinner party to end on a memorable note.
Make Ahead Magic
You can assemble everything except the toppings up to a day ahead and keep it covered in the refrigerator. Add the peanut butter cups and chips just before baking, and add an extra 5 to 7 minutes to the baking time since it will be cold.
Serving Suggestions
Warm slices pair beautifully with vanilla ice cream melting into all those crevices. For a dinner party, I like to drizzle warmed salted caramel over individual plates and top with chopped salted peanuts for that sweet and salty moment.
Storage Wisdom
This cake actually develops deeper flavor on the second day as the peanut butter seeps into the chocolate cake. Store covered at room temperature for up to two days, though refrigerating keeps it fresh for almost a week if your household does not devour it first.
- Warm refrigerated leftovers in the microwave for 20 seconds to recreate that fresh baked texture
- Freeze individual portions wrapped tightly in plastic for emergency dessert cravings
- The chocolate topping will firm up in the fridge but softens beautifully at room temperature
 Save
Save There is something wonderfully honest about a dessert that does not pretend to be fancy but still disappears faster than anything else on the table.
Recipe FAQ
- → Can I use natural peanut butter instead of creamy?
Creamy peanut butter works best as it spreads evenly and creates the right texture. Natural peanut butter with oil separation may make the layers too thin and affect the final consistency.
- → Do I need to mix the peanut butter layer with anything?
No, simply spread the room-temperature peanut butter directly on the bottom of the baking dish. It will melt slightly during baking and create delicious fudgy pockets throughout the chocolate cake layer.
- → Can I make this ahead of time?
Yes, bake it up to a day in advance and store covered at room temperature. It reheats beautifully in the microwave for about 20-30 seconds per serving. Leftovers keep for 2 days at room temperature or 5 days refrigerated.
- → What size pan should I use?
A standard 9x13-inch baking dish works perfectly. This size allows the three layers to bake evenly without overflowing. Make sure to grease it well so the layers release easily when serving.
- → Can I freeze this dump cake?
Yes, it freezes well! Wrap individual portions or the entire cooled cake tightly in plastic wrap and foil. Freeze for up to 3 months. Thaw overnight in the refrigerator and warm before serving.
- → Why is it called a dump cake?
While traditional dump cakes involve "dumping" ingredients in layers without mixing, this version has a slight twist - the cake batter gets whisked together first. The peanut butter and toppings still get layered directly into the dish before baking.